When asked to describe my creative hobby, I struggle to explain it in a way that is succinct and relatable, but that also paints an accurate picture of the full process. “I take photos of action figures” is true enough, but getting the macro lens out is just the very end of a much longer process. Recently, I was asked to participate in an annual group invitational art show hosted by Five 15 Arts. Saying “yes” was a given, but so was that panicked feeling of staring at a blank canvas.
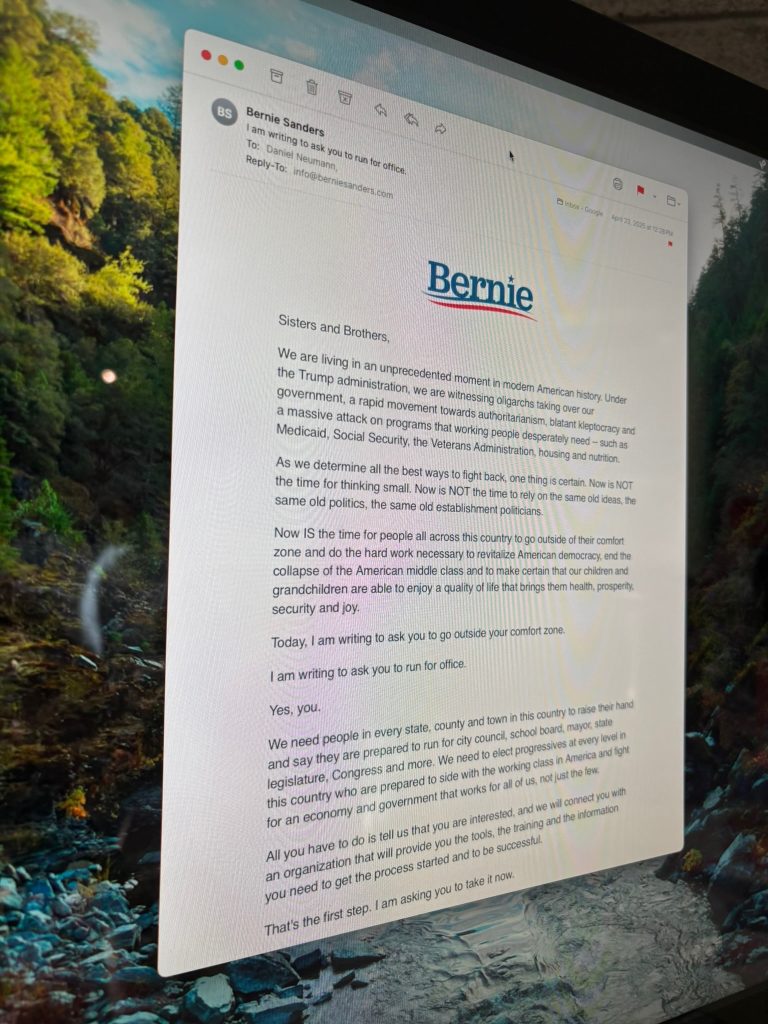
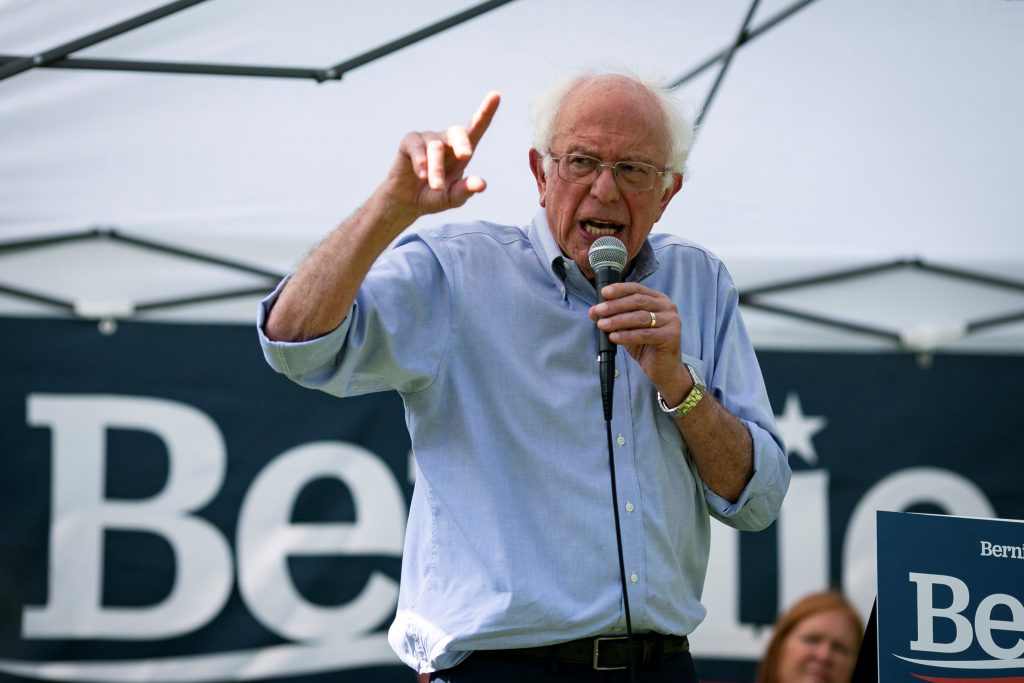
I am adamant about each of my shots telling a story. Most often, I compose a multi-shot visual narrative that tells the story sequentially. For a one-off piece, I need to pack a lot into that single photo.I was really struggling to find the story for this assignment, to the point I was about to give myself the freedom to just create “a nice shot” … meaning, it would be well crafted, composed, and lit, but it really wouldn’t say anything. When I was admitting this defeat to Meg, my wife, she responded: “No! In times like these, art needs to send a message!” Put in my place, I doubled down and landed on an idea that, although a bit on-the-nose, may spark some conversation. Maybe not as much conversation as Meg’s suggestion about G. Rider strapping on an explosive suicide vest (relax, it was a joke! Although I did quickly buy this new G.I. Joe figure, just in case). As I was thinking the idea through, I remembered an e-blast I had recently received from Bernie Sanders that was basically encouraging everyday progressives to run for office. After addressing the direness of our times it stated: “Today, I am writing to ask you to go outside your comfort zone.” And followed up with: “Yes, you.”
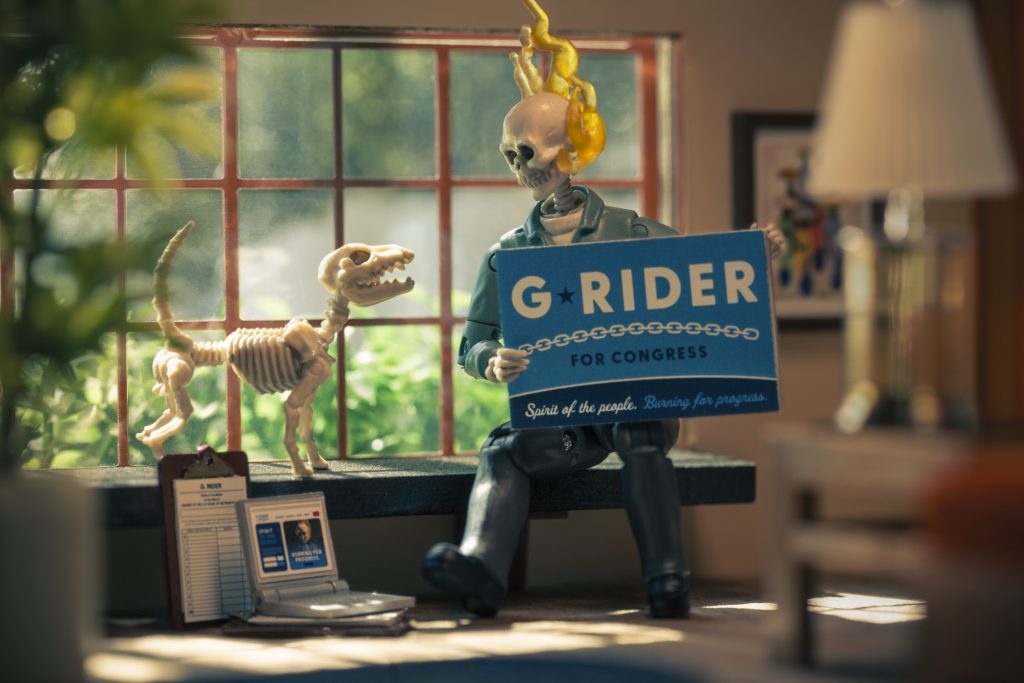
Now, I hadn’t even decided that the new piece would be G. Rider related and was leaning towards creating something fresh. And, if I was going to pursue this “run for office” concept, was it the right tone for the version of this character I’ve spent years developing. After some mental back and forth, I decided that I could create a one-shot story about G. Rider recognizing the unprecedented nature of our time, going outside HIS comfort zone, and attempting to make progressive change. Hard to describe the feeling of relief that comes once the idea solidifies. Now I just had to make the shot happen!
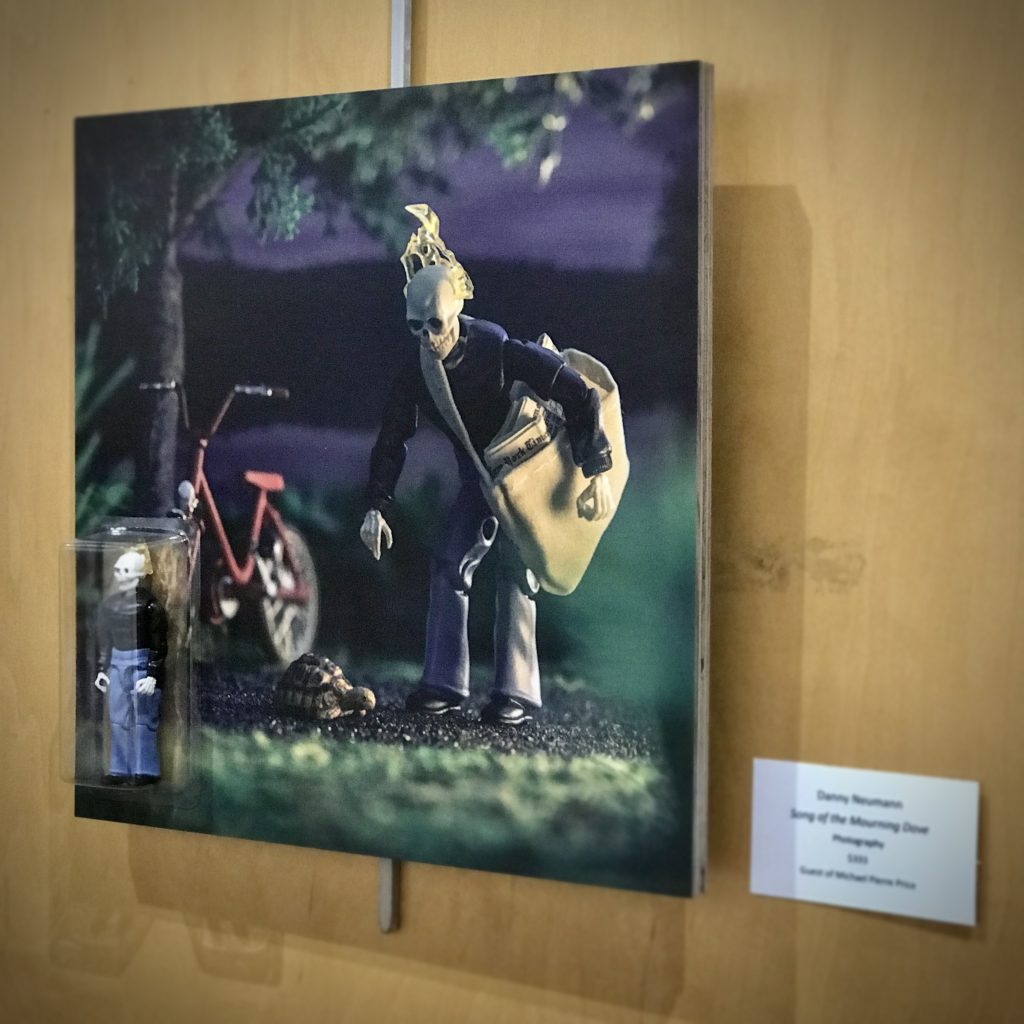
The last time I was invited to participate in the Five 15 invitational show, I created a one-off G. Rider piece that actually had a one-of-a-kind G. Rider action figure affixed to the print, lying under a protective bubble, much like you’d see with an action figure hanging on the shelf in the toy isle. I felt that addition really made the piece special and I was thrilled when a local art collector purchased the piece. I decided this piece for this show also had to contain that special element. Of course, needing to create a brand-new custom G. Rider (that I’d be willing to part with) would dominate the labor involved in making this shot happen.
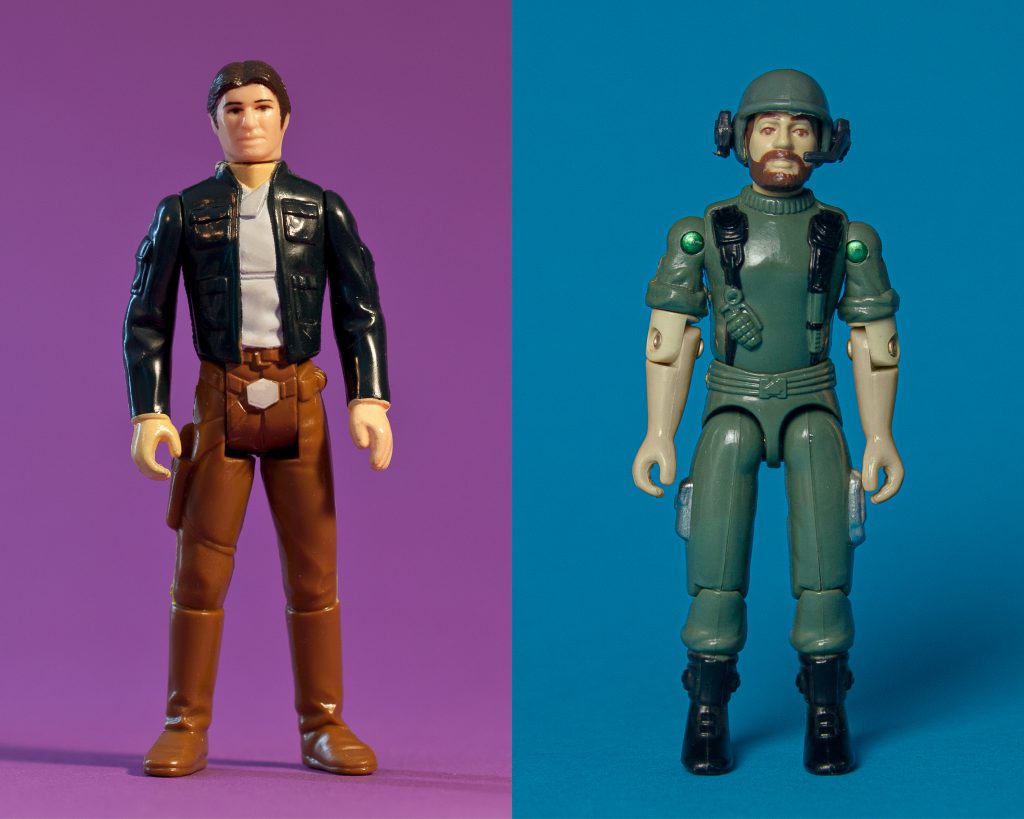
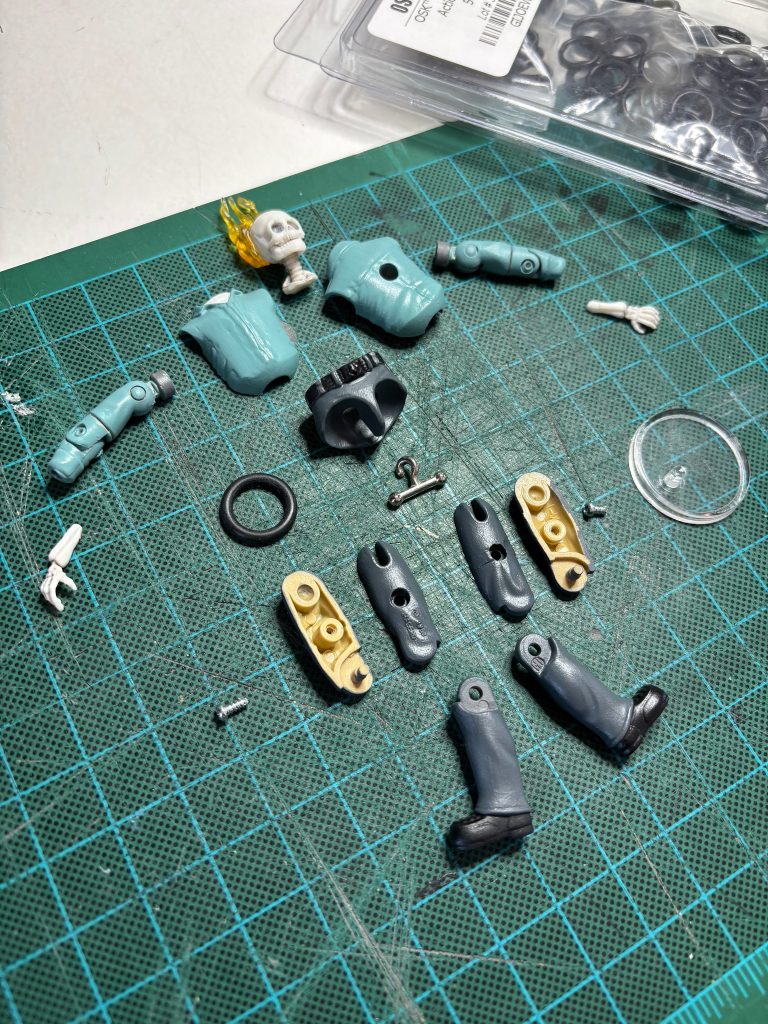
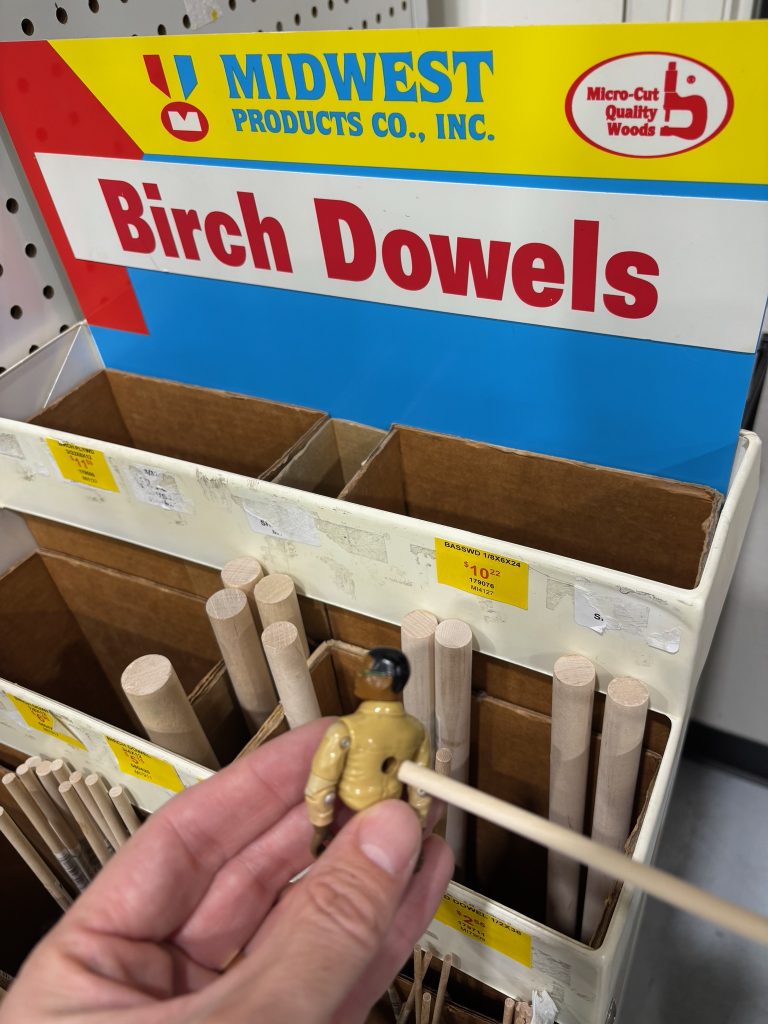
So, this is where the “rules” of my creative hobby get particularly nerdy. It’d be easy to gloss over, just out of the sheer difficulty explaining, but it is an important aspect of my niche niche, so here goes. I collect vintage action figures and, long ago, narrowed my focus to a particular era, 70s through 80s, and a particular scale: 1:18, aka: 3 3/4″. Think vintage Star Wars. And, as you’re contemplating vintage Star Wars figures, try and remember how they moved. Most had five “points of articulation,” meaning, places where the figure could be moved. For this style of figure, they usually has a head/neck that could swivel back and forth, arms that could move up and down, and legs that could kick forward. That worked for us kids of the 70s, and was by no means a deterrent to countless hours of imaginative play. But then, 1983 rolled around and ten year old kids visiting their local Bradlees turned the corner on toy isles newly populated with a line of 3 3/4″ action figures branded under the banner: G.I. Joe. Is that a real memory, Danny? Yes, it is. Which figure did your mom buy you that day? Rock-n-Roll, of course. An unmistakable aspect of these new army figures was their O-ring style construction (more on that later) and increased articulation. At first, the head/neck was a similar, back and forth swivel, but in a couple waves that was upgraded to a ball joint, meaning your Joes could now nod up and down, too. Shoulders were also a ball joint, giving tons more range of motion. Legs could still kick, but had a unique construction that allowed more hip movement. And, these figures had knee joints and elbow joints and waist articulation! In a year time, one additional, but crucial, point of articulation was added: a bicep swivel. This extra articulation vastly expanded the way kids could pose their figures. And, by “kids,” I mean middle age men who decided to turn their collecting passion into a creative outlet.
In order to achieve the subtle “body language” needed to convey mood and feeling and emotion and dynamics, I quickly gravitated to this O-ring style of vintage action figure construction as my default model for photographic storytelling. Of course, the characters I wanted to feature were not straight-from-the-toybox Joes. I wanted to use that format but needed NEW vintage figures. Lucky for me, vintage G.I. Joe figures have screws holding them together which, once removed, allow you to almost completely disassemble them. And, because this toy line was popular for over a decade and rarely reused parts, there are hundreds of unique figures that can be mined for parts and pieces. Besides very basic modification and builds, I have not trusted myself to create the final characters I’ve needed for projects like The Super Neumanns, Fan Club, G. Rider, and Leeds the Jersey Devil. Fortunately, amazingly generous and talented friends (Pierre, Courtnay, please take a bow) have helped me with the craftsmanship and produced the stars of those stories. Those custom figures are part of my family and are prized-possessions. There have been a few occasions, however, where I felt that task of building the figure needed to stay with me. My technique and process has been rudimentary, at best, but, for the need, the end-products have sufficed. The G. Rider that accompanied my first Five 15 piece is one such example. I dug deep and made that figure with sandpaper, spray paint, and grit. This current project needed to be approached similarly but it was time to up my game.
As a starting point, I determined that candidate G. Rider should change outfits. He just isn’t a douchebag disappointment like Fetterman who insists on wearing his hoodie and basketball shorts. Not that G. Rider needed to be too uptight with suit and tie, but he could at least dress like the guy who sent him the email, encouraging him to run for office.
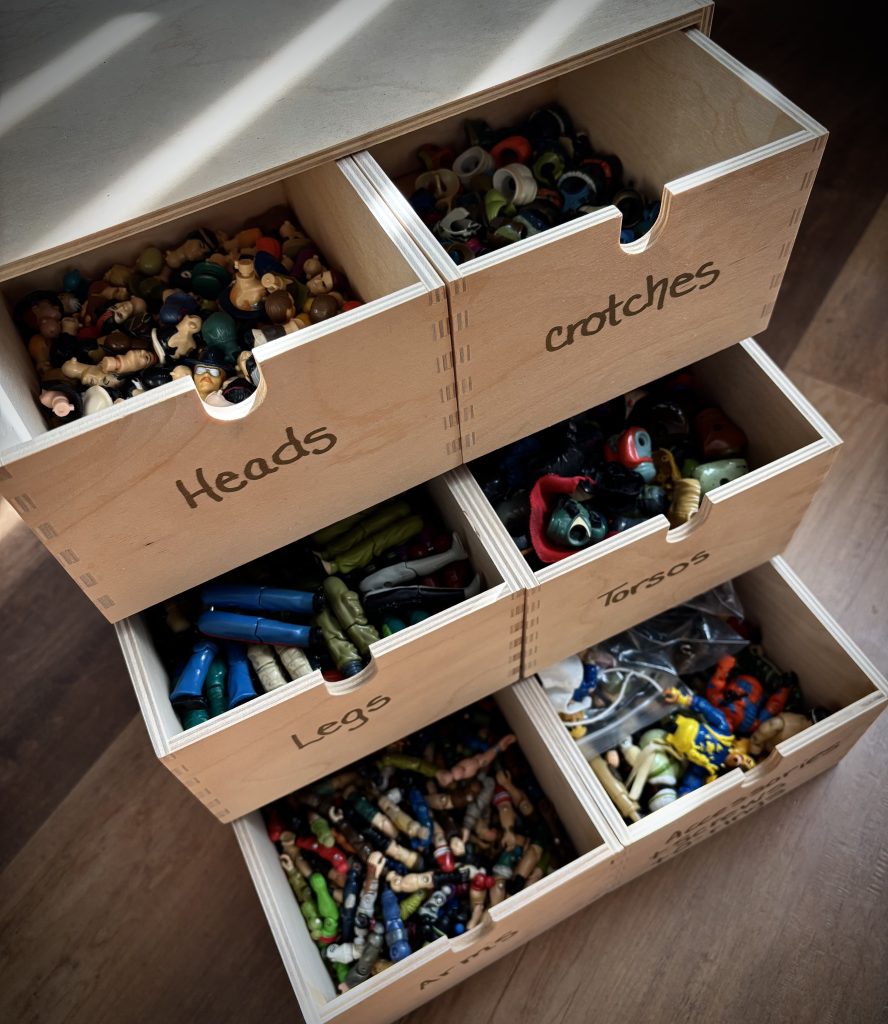
Now, what vintage G.I. Joe pieces could I use to create a similar outfit? Time to look through some exhaustive visual databases of all Joe figures ever produced and then dig into my finely curated bins (thanks Courtnay and Adam!) and see what could work. No, your eyes are not deceiving you, that is a drawer full of crotches.
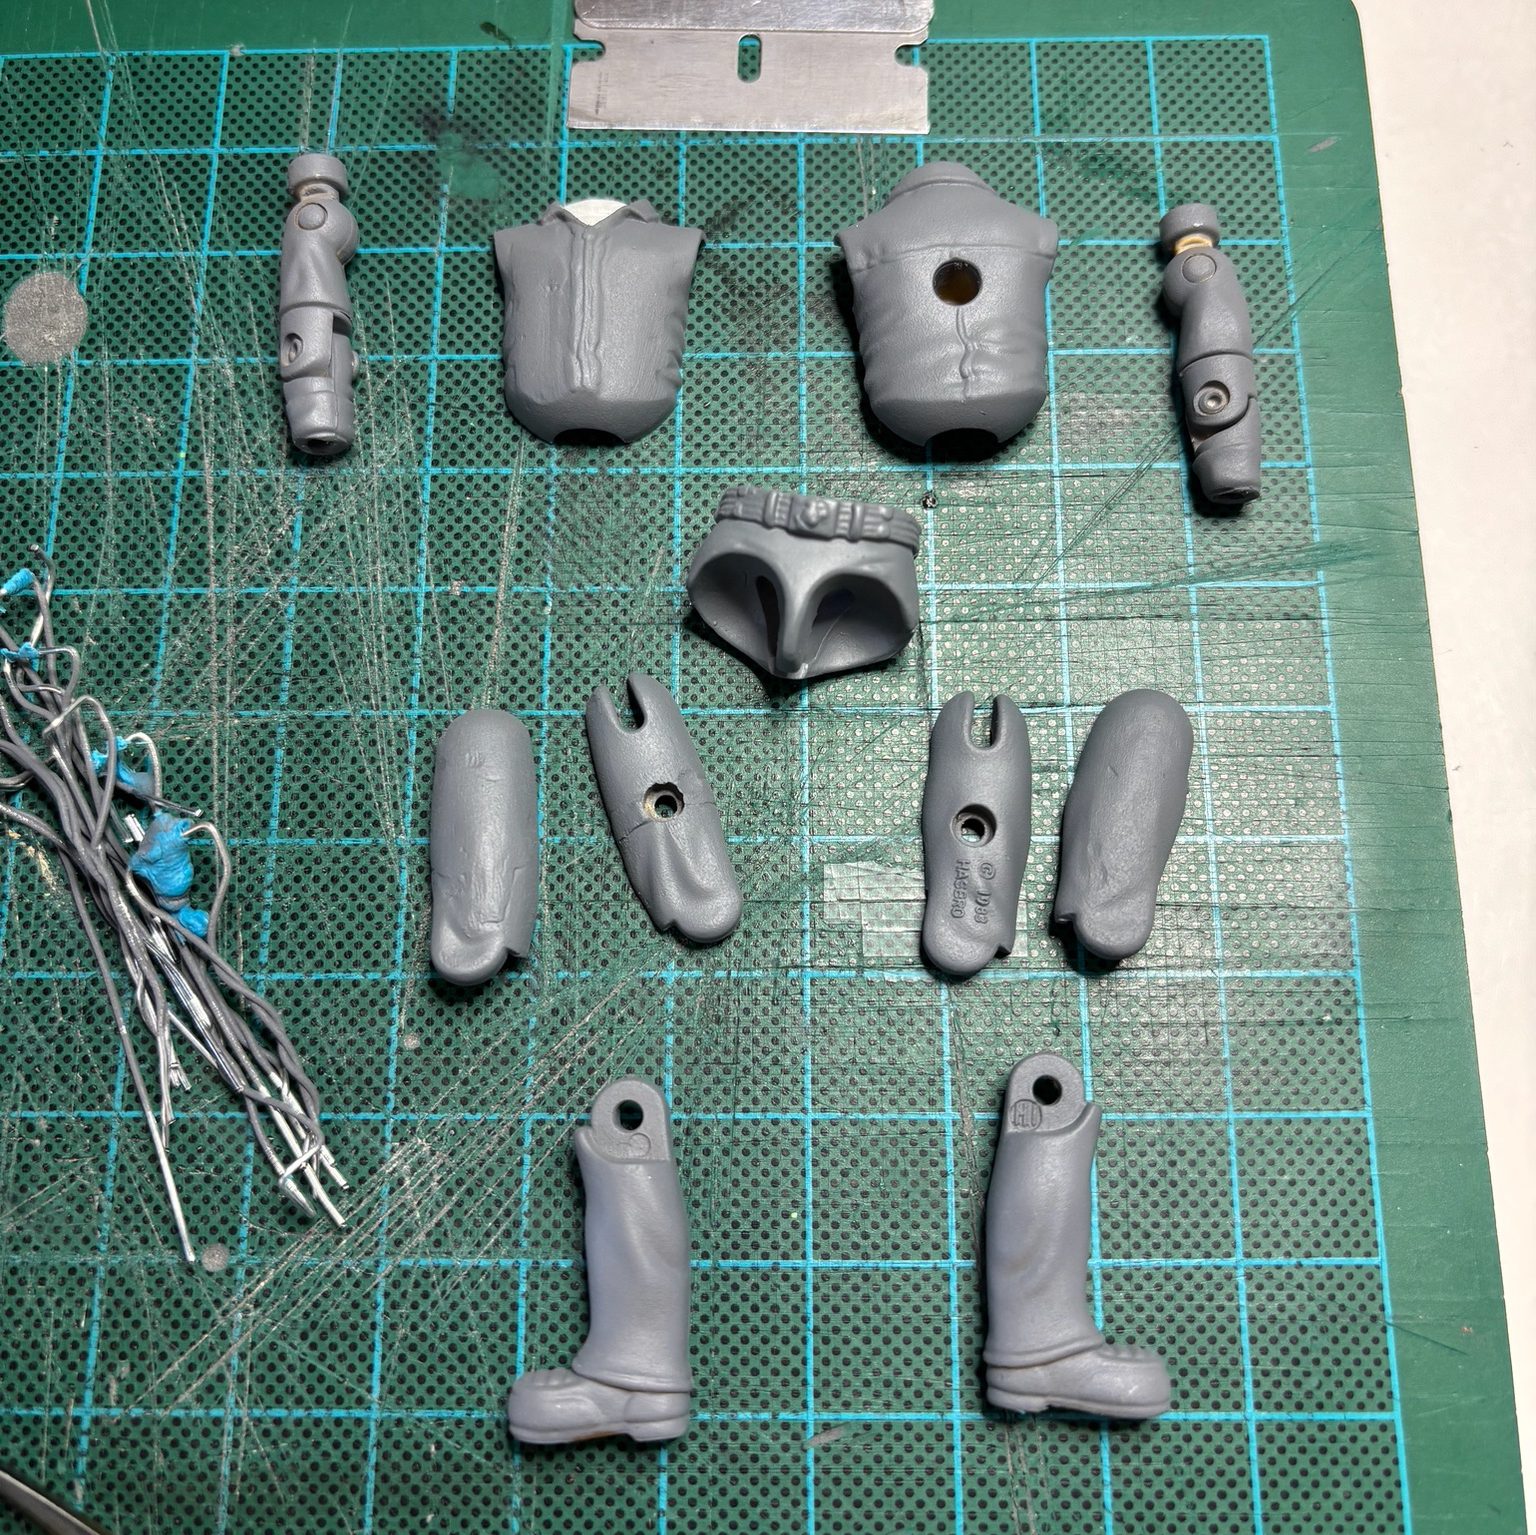
I pulled a few possibilities and quickly narrowed things down to the basic building blocks. Because I’m a novice with the Dremel, I tried to find pieces that needed the least amount of modification. But, those Marine Dress Blues legs just didn’t feel right.

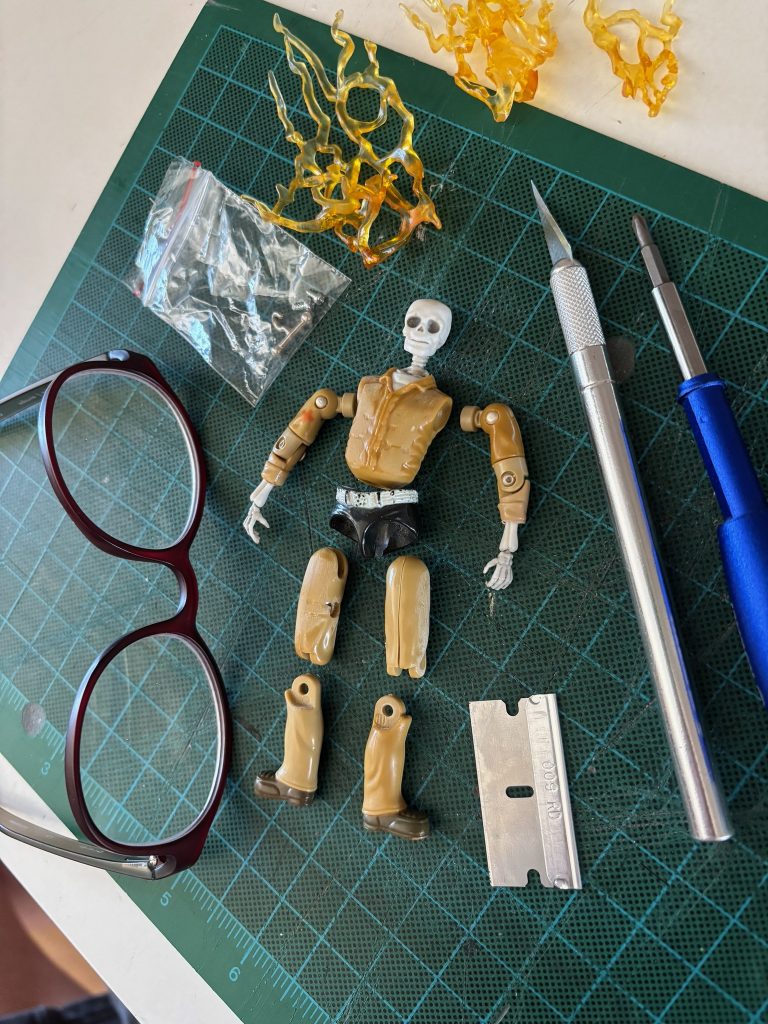
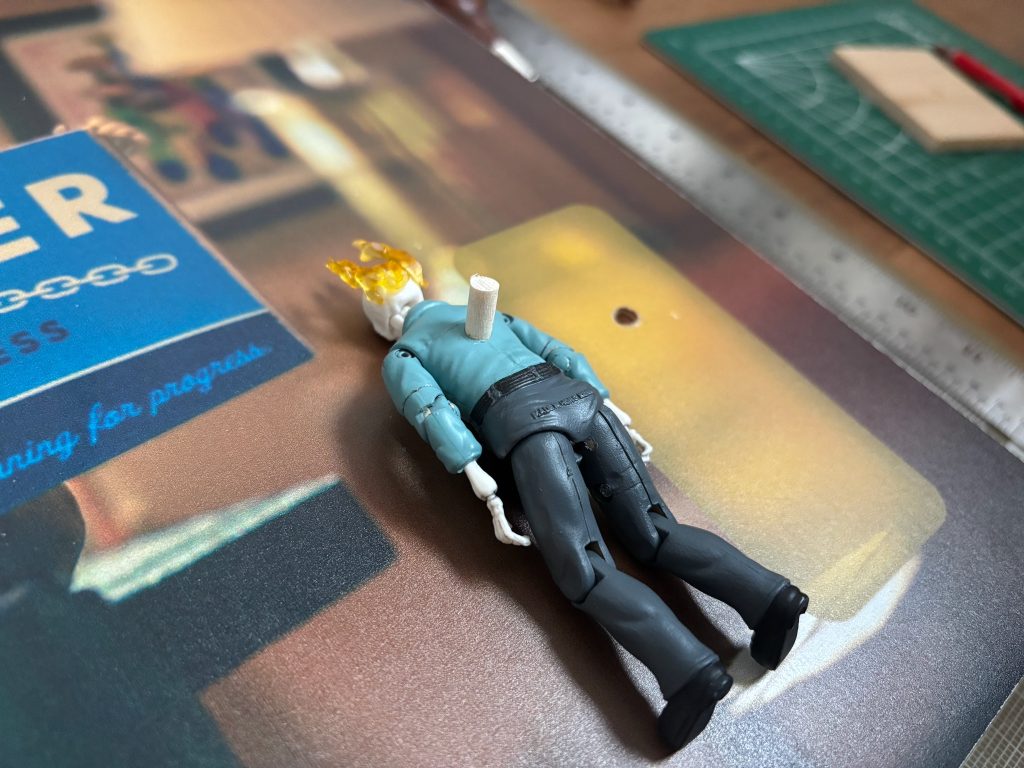
I have a little reserve of 3 3/4″ scale skeleton pieces that I’ve been able to use for G. Rider alternates. Just needed to remove the Joe hands and lower forearms, drill holes in the rolled up sleeves, and insert the corresponding skeleton parts. I also needed to carefully carve out the skeleton collarbones and neck piece that would insert into the Joe torso collar.
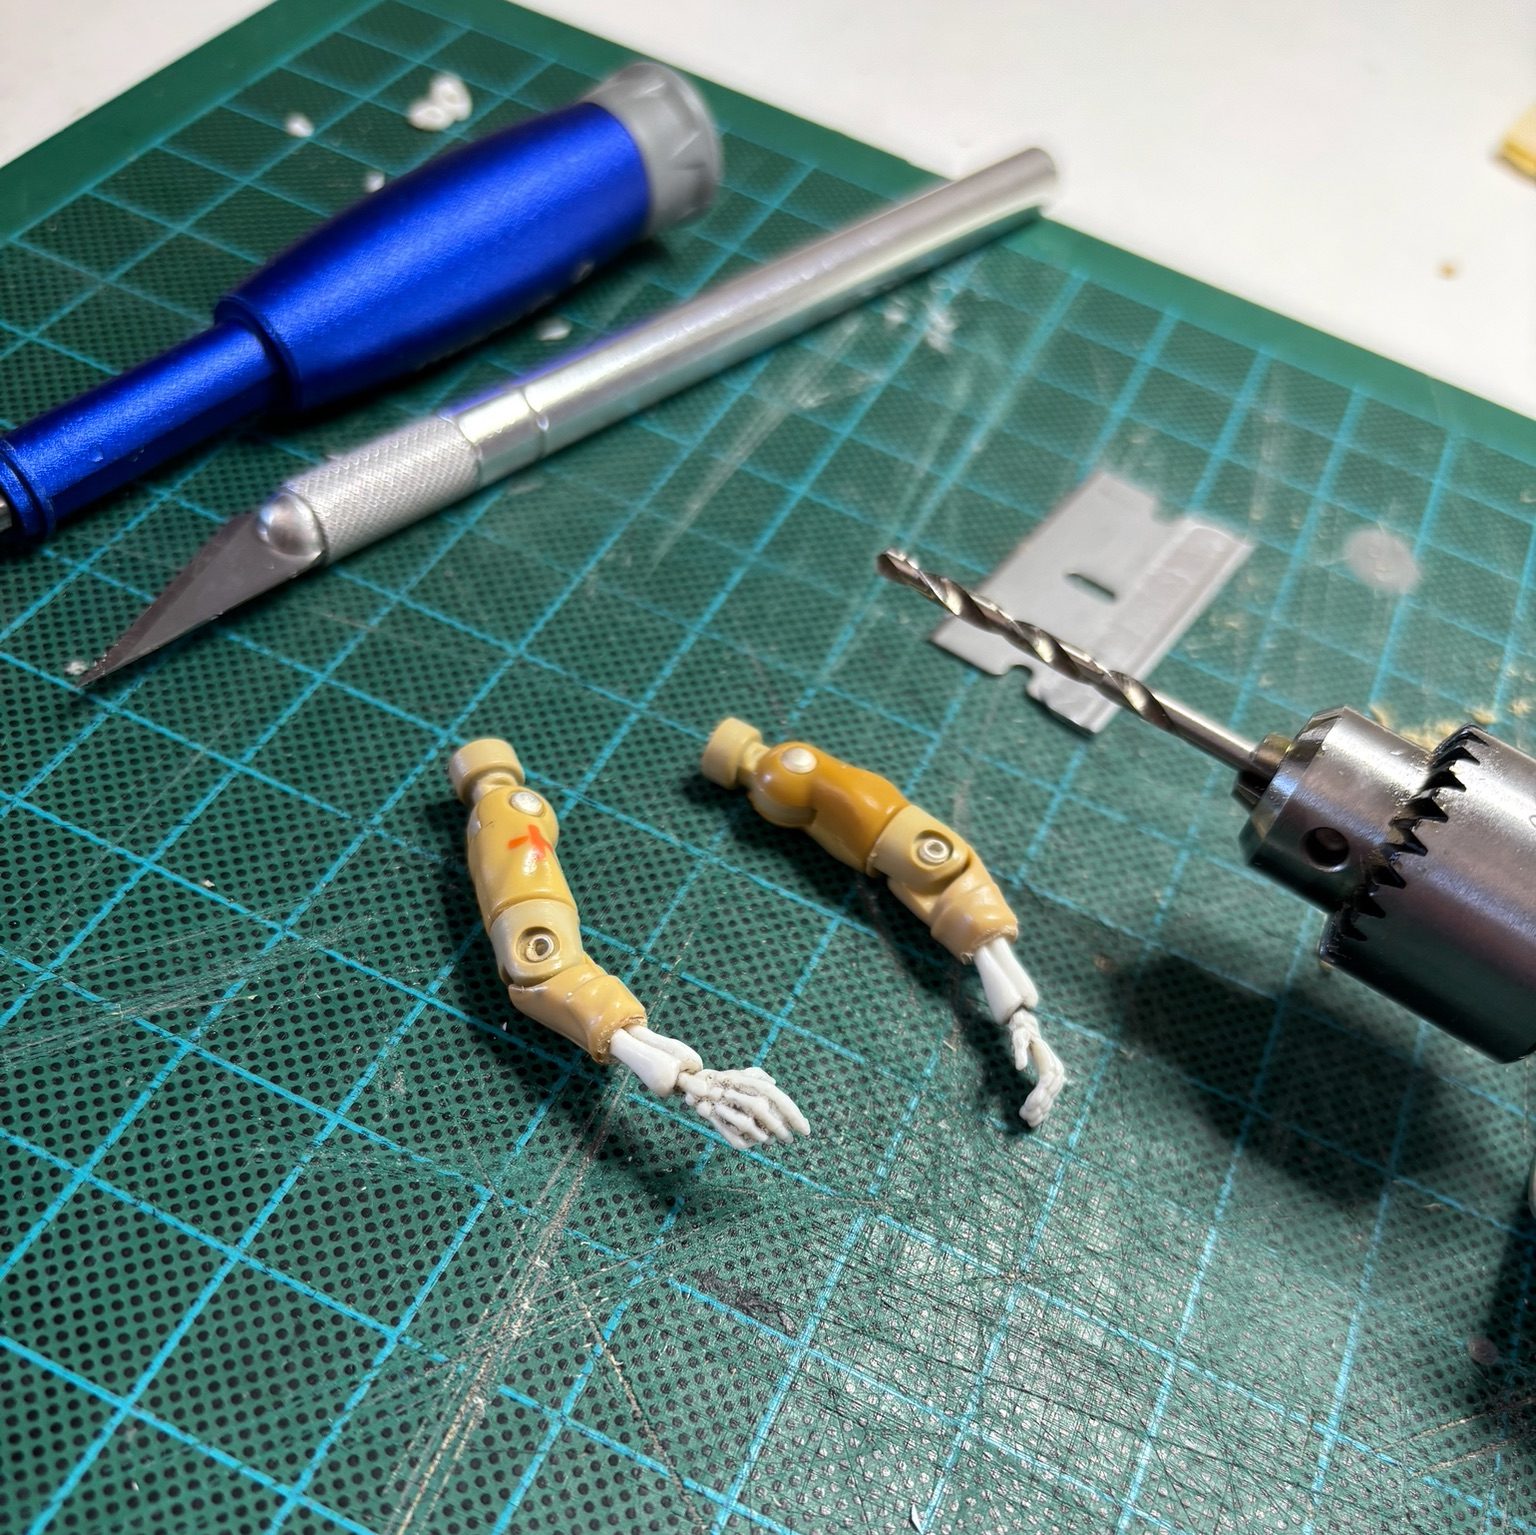
After Dremeling and sanding off the extra pockets and gun holsters, I was ready to prime these building blocks.
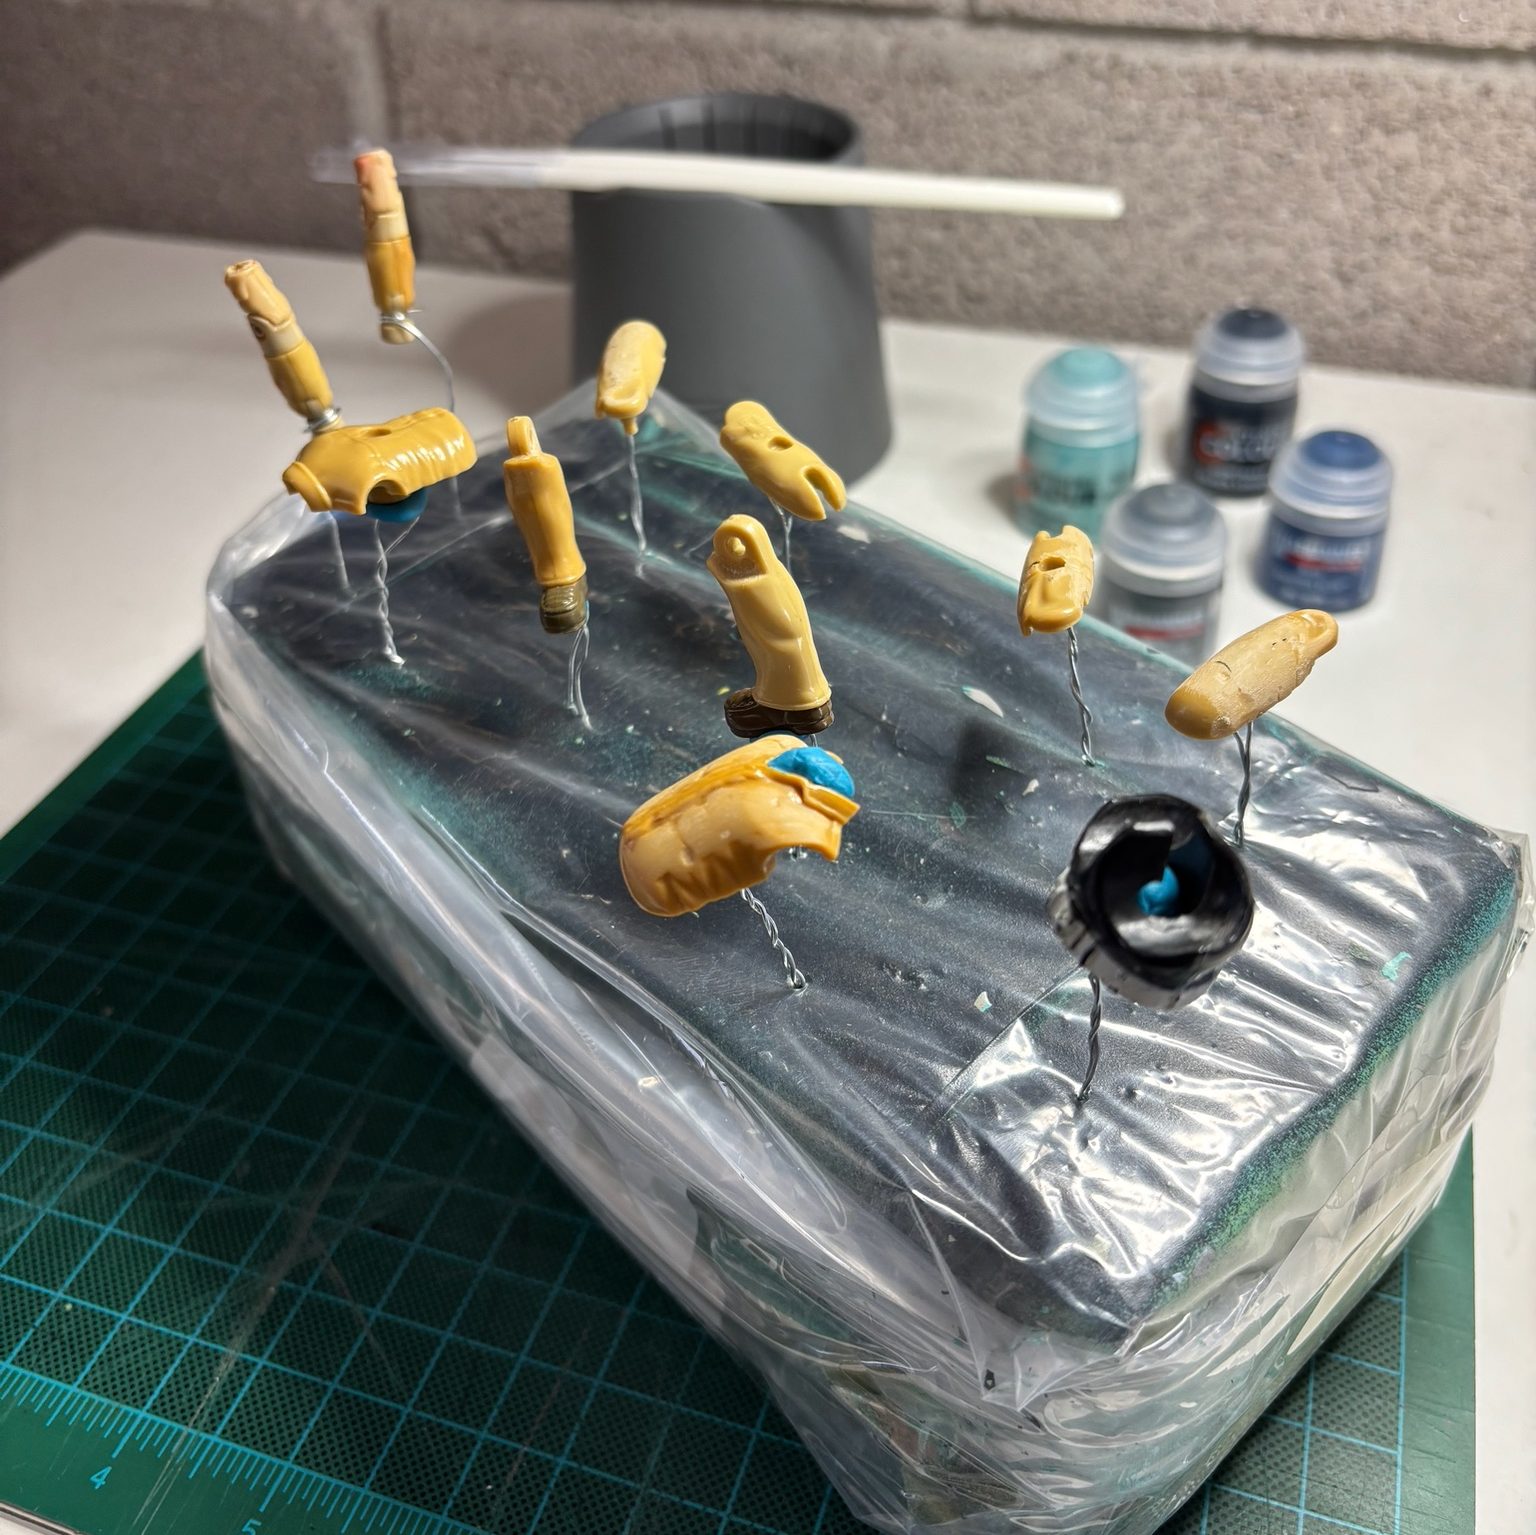
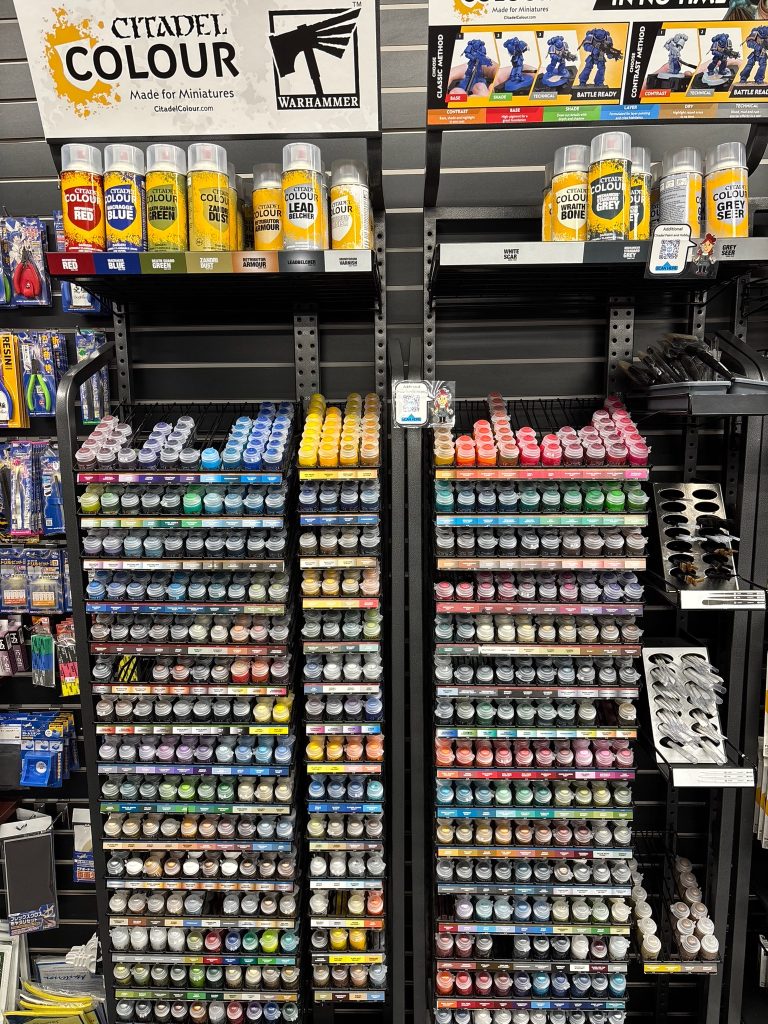
I knew spray painting was not an ideal choice for custom miniatures but had been hesitant to commit to hand brushwork, until now. I steeled myself and took a journey to a hobby gaming store to track down some Citadel (now “Warhammer”) paints, recommended by the old pro, Pierre. Although I only needed three colors, I stared at this display for a looong time.
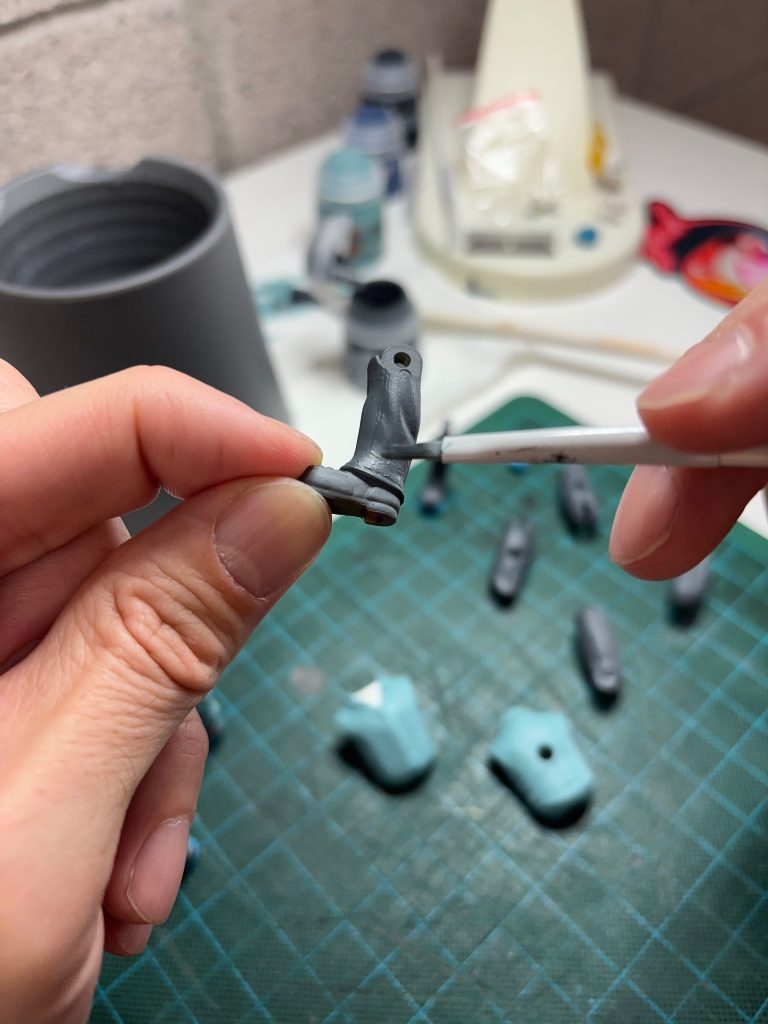
Eventually I made my choices, and dove into the steady-handed process of miniature painting.
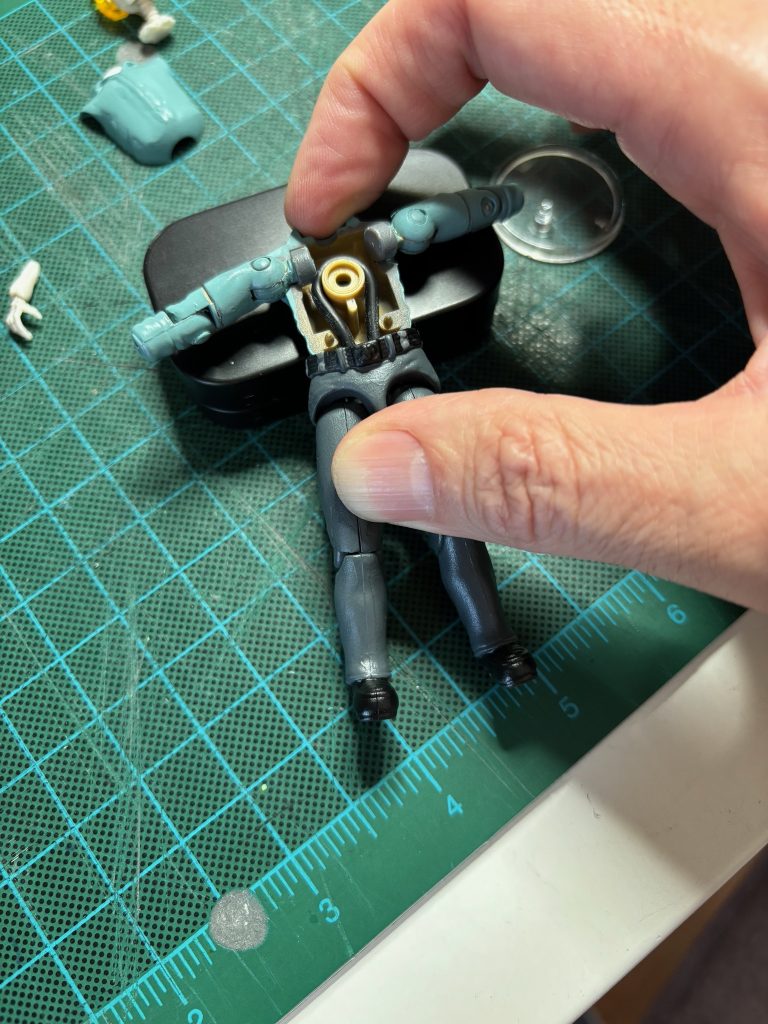
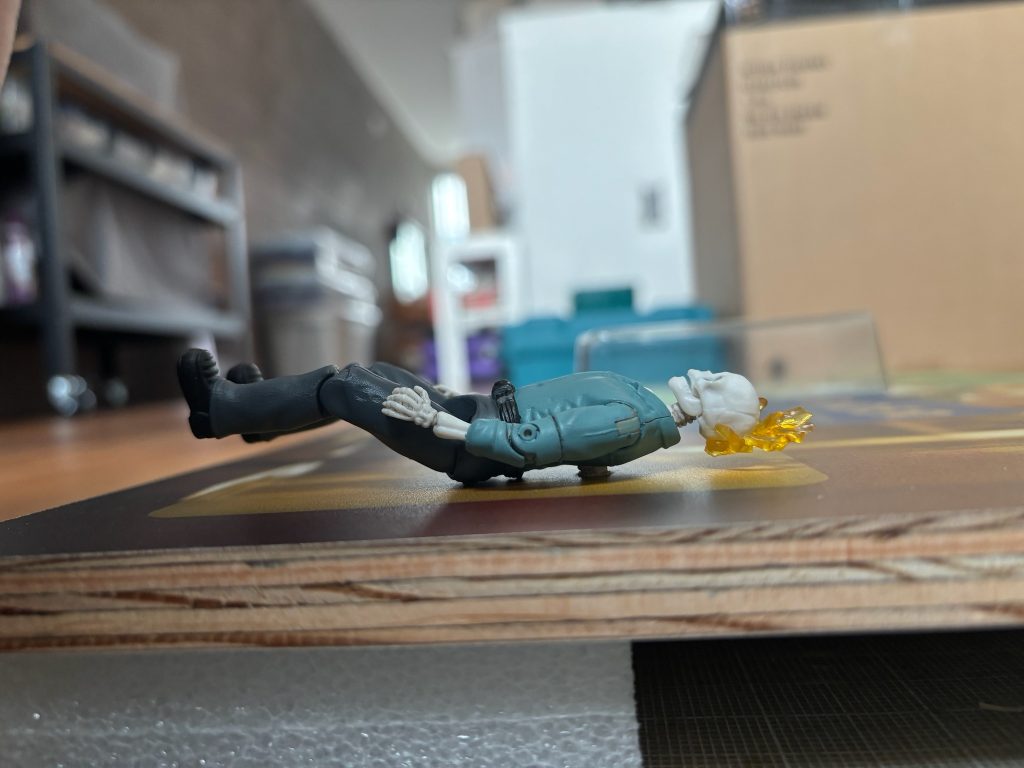
After being satisfied with the above pieces, it was time to put this nascent politician together! Note the aforementioned O-ring, which serves to hold this unique construction together. The Joes you’ve hung onto since childhood may be very floppy at the waist, or, have come apart entirely. That is due to the vintage O-ring drying out and breaking. Those Joes are easily salvageable! Bring ’em to me and I’ll replace their O-rings for ya.
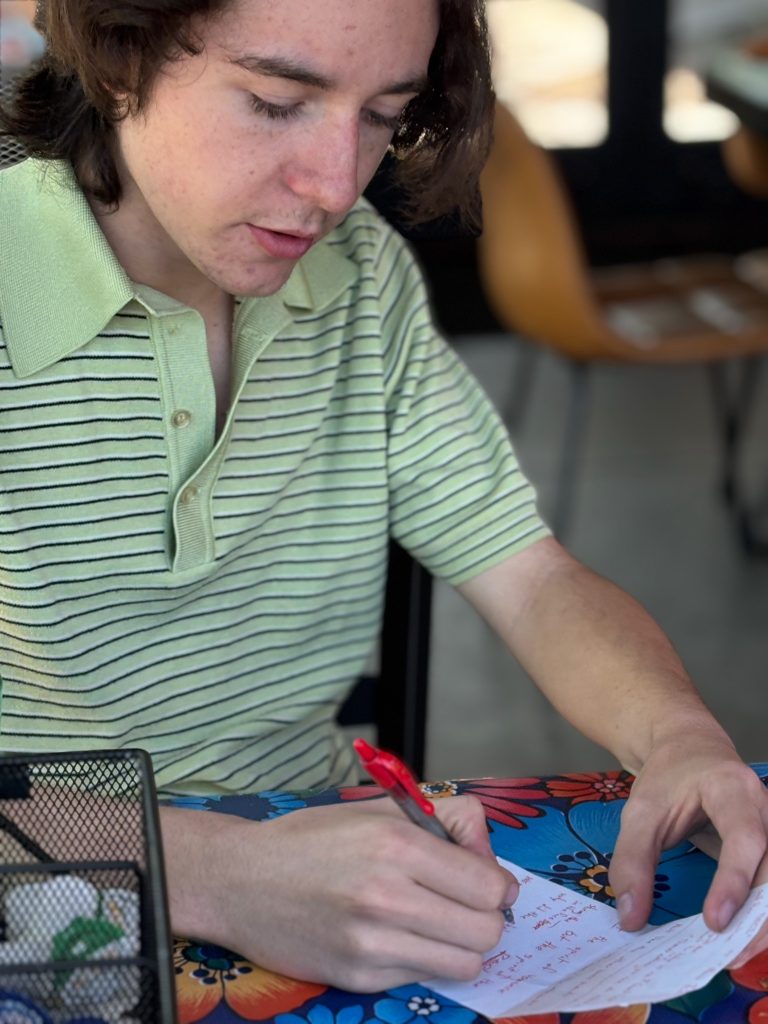
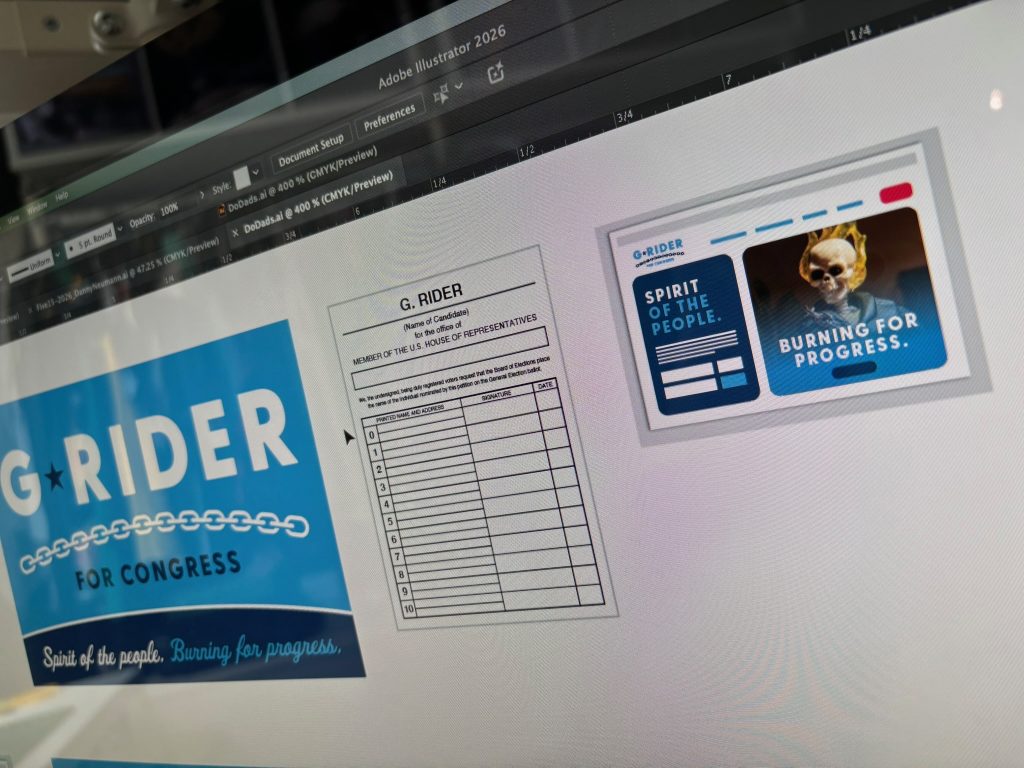
As I was building candidate G. Rider, I was also brainstorming campaign slogans and yard sign designs. I knew these would be minor details but my work prioritizes little things! It had to feel right for G. Rider and his curated world and it also had to be true to MY philosophies and outlook on the world. This was a tricky task, so I outlined the problem-to-be-solved with my stepson, Elliott, who is a great sounding board and fount of good ideas. We went out to breakfast with the goal of not leaving until we had G. Rider’s slogans worked out.
We had to leave some good ones on the editing room floor but were happy with the two we settled on: “Spirit of the People” and “Burning for Progress”. Now, I just had to design the sign. And a mock webpage. And a signature petition form.
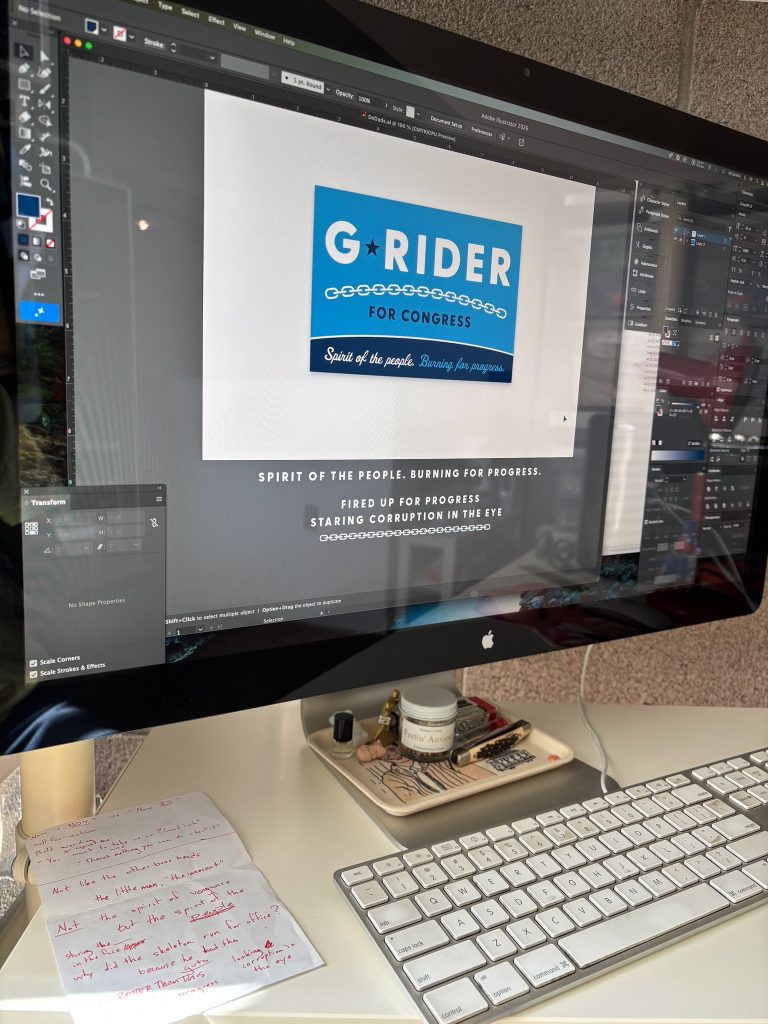
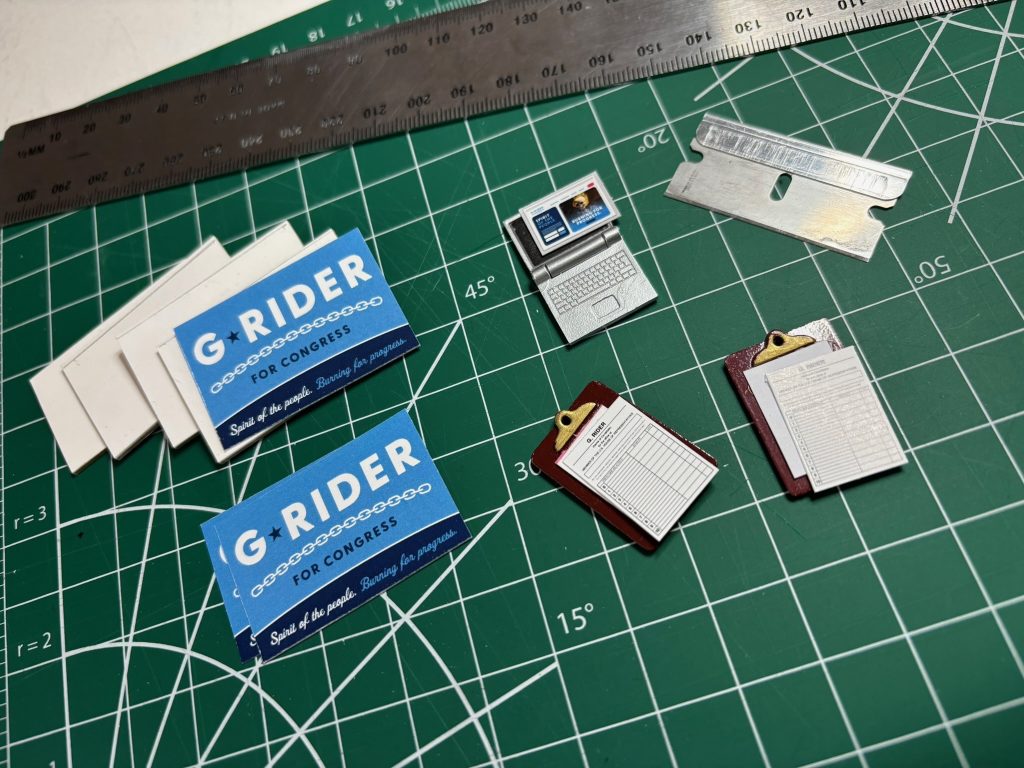
Then to FedEx to print out my tiny designs.
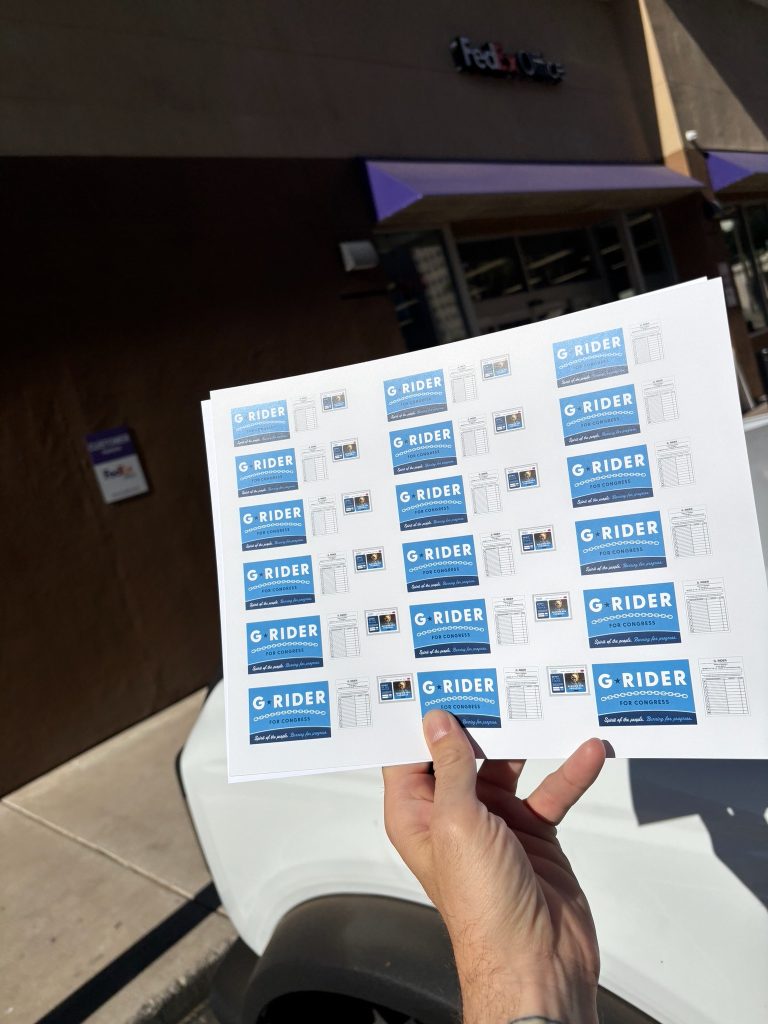
And, finally, cutting them up and applying them to minuscule laptops and clipboards.
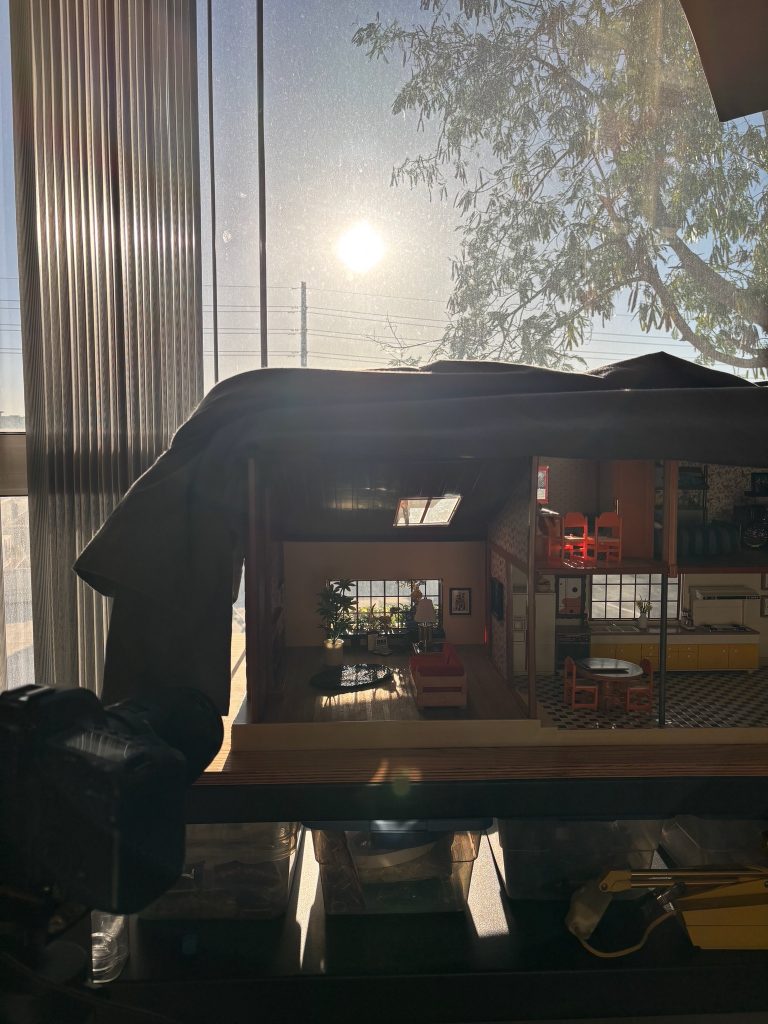
Having all the necessary pieces in hand, it was time to compose the shot. I had originally envisioned this taking place in G. Rider’s kitchen. That’s the place that families often talk and make big decisions. But something felt off as I attempted working in that location. So, we moved to the living room. I felt that this conversation would be well served in front of the big window, with natural light flooding in. That seemed optimistic and warm and hopeful. I had G. Rider’s house set up next to my actual window and, over the course of a few days, just watched how the afternoon sun looked as it streamed in both my and G. Rider’s windows.

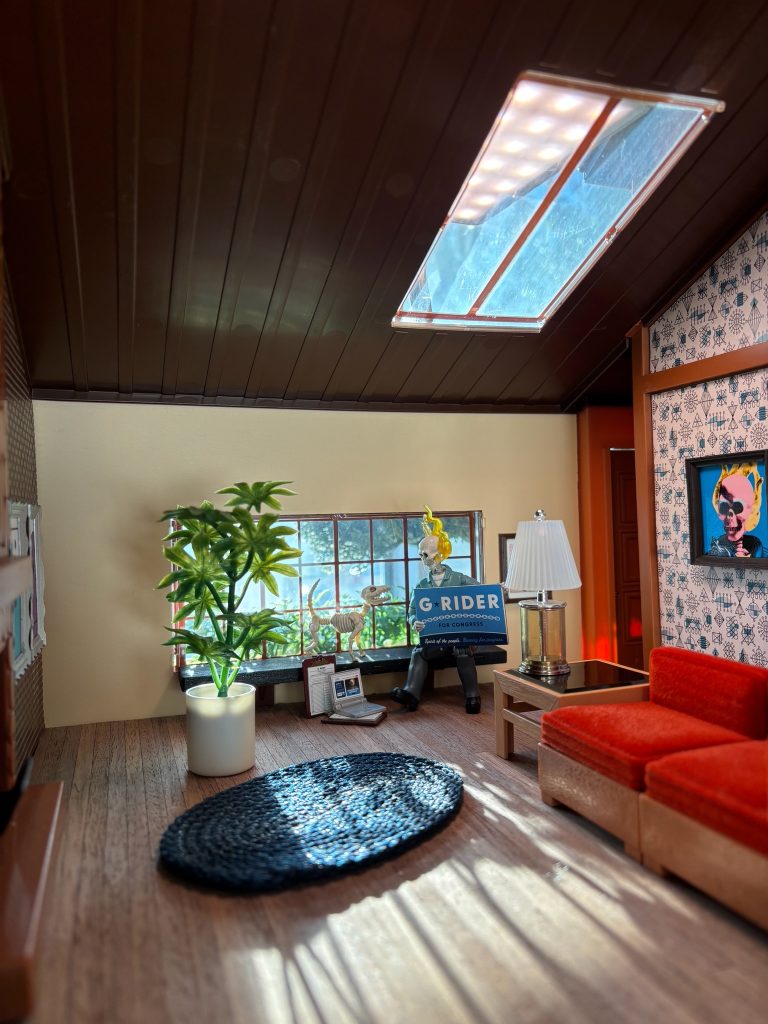
After about 80 exposures which are essentially OCD-driven subtle variations of pose and lighting and tangent-adjusting, I felt I had finally gotten “the shot.” I try and achieve everything in-camera and only rely on retouching to clean up minor imperfections, so that part of the process is surprisingly quick. I do have a color setting I apply to all my G. Rider shots that I’ve been using consistently since “Part 1.”

I did struggle to choose the final exposure but had it narrowed down to two. The main difference was how much sun was streaming in the window and what angle it was coming in. With the help of my family, I eventually eliminated the foreground shot (in the above photo), although I really loved the warmth.
Once my shot was finalized, I reached out to the good folks at Arc Document Solutions and asked them to print me up my usual order: print on 1/2″ exterior-grade, resin-coated plywood panel called “medium density overlay” (MDO) with a screwed in French cleat with spacer bracket. Special shout out to Terry, who has been helping me get my stuff printed for years now. In the meantime, I ran to Arizona Art Supply and grabbed a small dowel which I need to help affix my custom G. Rider figure to the print itself.
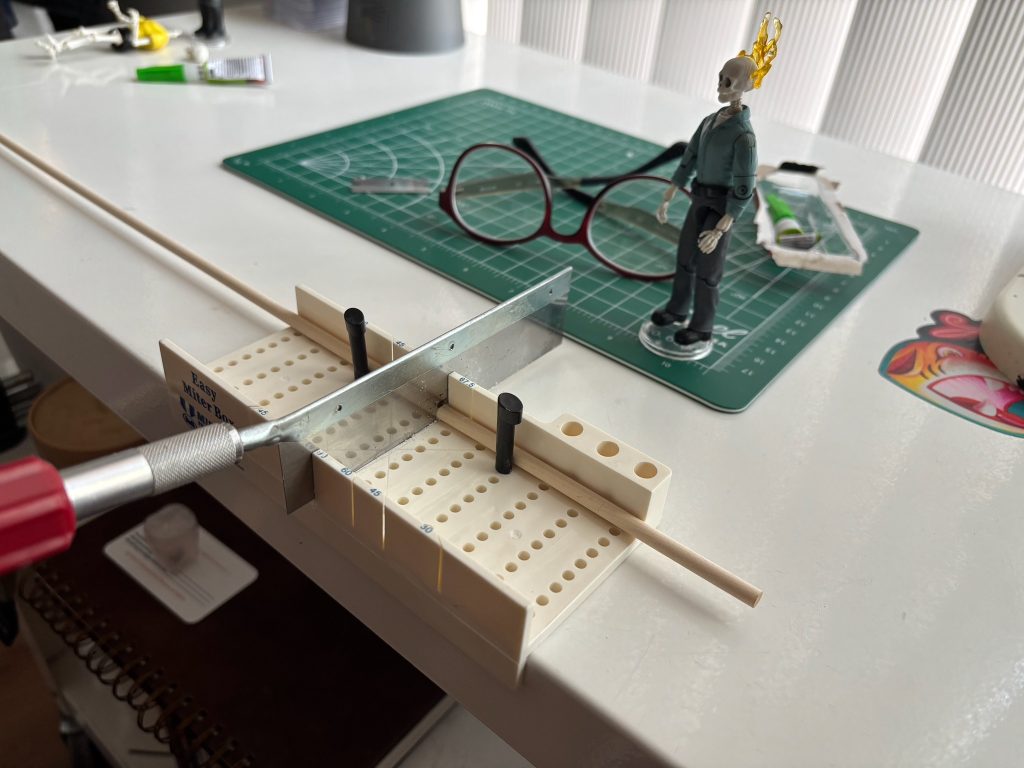
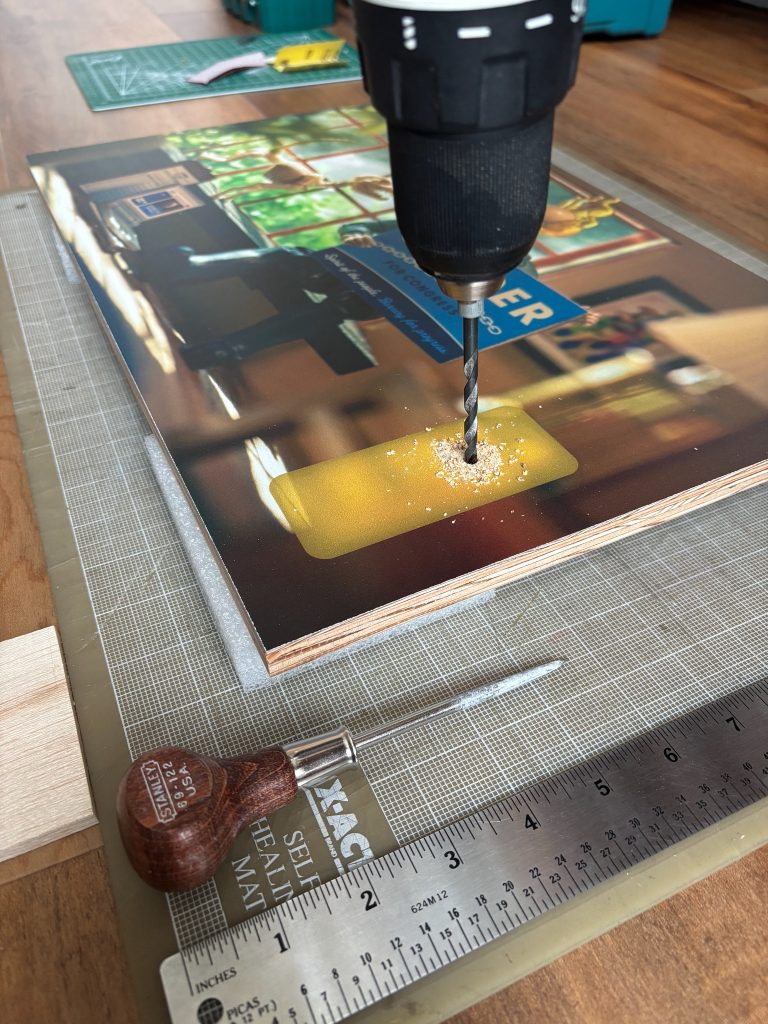
Because this figure is no longer a toy and will be meant to pass the tests of time, I glued some of its joints, just in case it suffered the dry and cracked O-ring syndrome someday. If someone actually buys my piece, I don’t want them looking at it one day and seeing G. Rider’s legs detached and floating free at the bottom of the bubble! Speaking of, as I was fitting and positioning G. Rider for his final home, I realized that, especially with his head flames, this 3 3/4″ figure was on the tall side and didn’t quite fit in the bubble. To help, I trimmed his hair flames and even removed a vertebrae from his neck. Yipes, still too tall. Had to resort to bending G. Rider’s knees a bit. Not ideal, but the pose did mimic his posture in the photo.

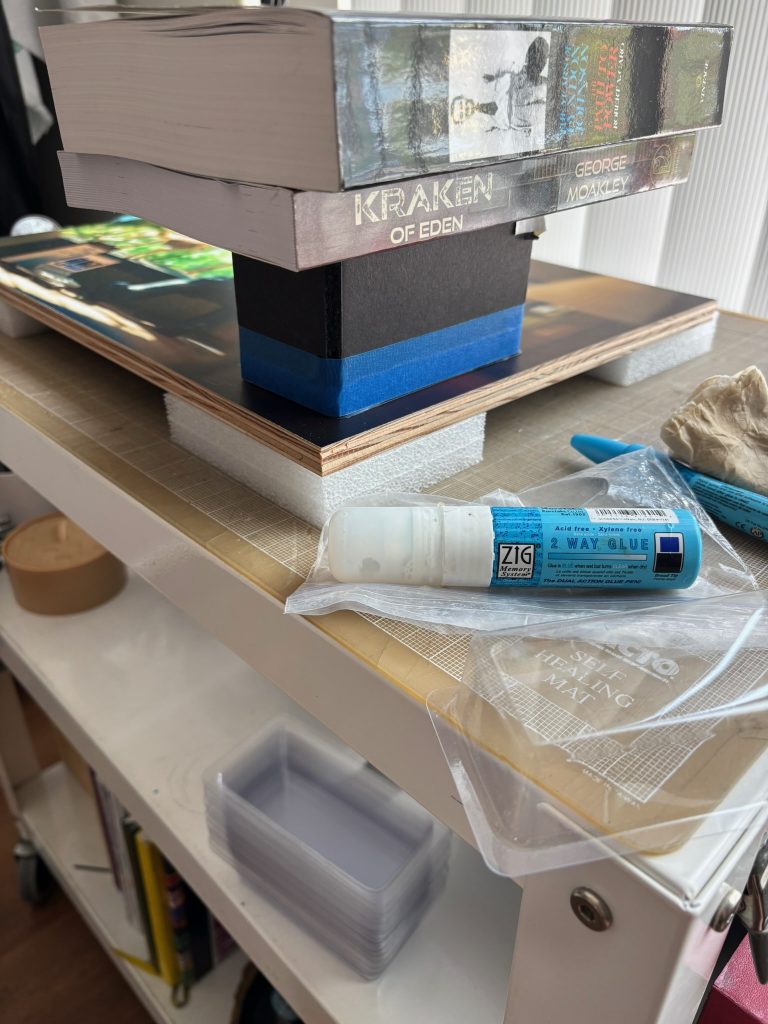
For some reason, the final act of sealing the bubble to the print, using ZIG Two-Way Glue, stresses me out. It is meant to dry clear and essentially be invisible, but I’ve had some mixed results and there really is no do-overs. I coat the edges of the bubble, place it carefully, and then set some weight on it overnight.
At this point, all that was left was to deliver the piece to Five 15 on the appropriate day and then attend the opening reception, which, as of this writing, was last night. G. Rider was hanging out in the back of the room and honored to be in such good company.
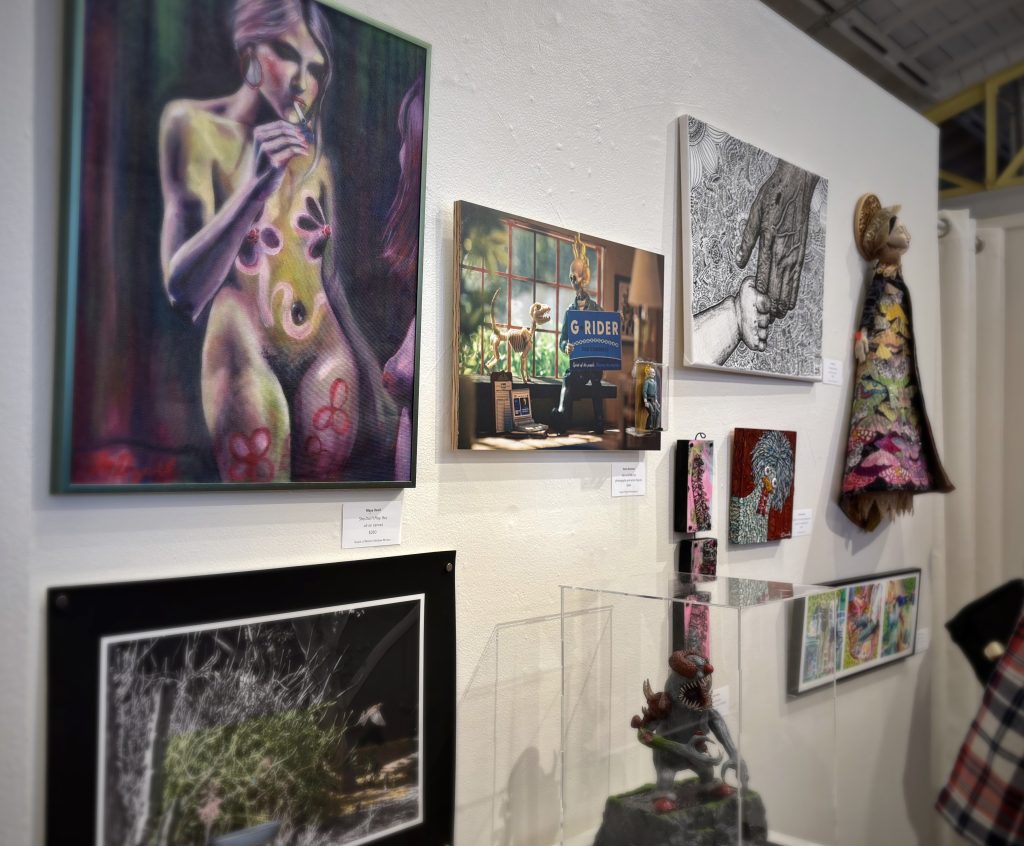
Many thanks to my fellow Dan, Daniel Prendergast for inviting me and G. Rider to participate in the show. After so many years focused on my late-life career change to nursing, I have been in a bit of a creative rut. This was a great kick in the pants and hopefully the catalyst I needed to get some new projects going!
If you actually read this far, thank you so much! Not easy to explain all this in the back of a crowded art gallery when people ask: “is this your piece?”